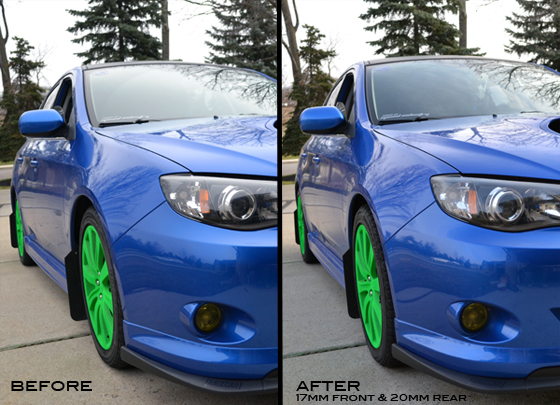
Ichiba spacers offer a simple way to stance out your OE or aftermarket wheels. The 2010 Subaru WRX you see featured on this blog post is our Subaru rep, Alex Skatkov. Alex recently installed a set of the “Version 2” spacers with basic hand tools so we could showcase the simplicity behind the installation.
Ichiba Manufacturer Page – Ichiba Hubcentric Wheel Spacers

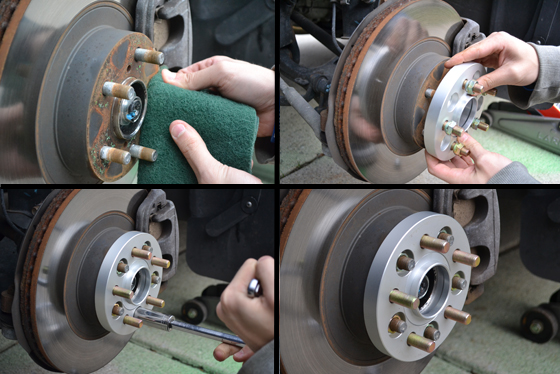
As you can see the Ichiba Version 2 wheel spacer has lengthened wheel studs built directly into the spacer along with an empty bolt pattern for your original studs to fit into. Clean off your hub build up with a scrub pad, slide the spacer directly on your hub, torque down with the included nuts, and put your wheel back on. Installation literally take only minutes.

Alex chose to go with the 17mm in the front and 20mm in the rear but we have many sizes available ranging from 5mm to 38mm. Check out our Ichiba Wheel Spacers – New Sizes blog post from about a month back to see some up close detailed photos of the spacers along with a full list of available sizes.


Trackbacks & Pingbacks
[…] show you just how easy it is!!! i know its not on an eclipse but the application is universal! Ichiba V2 Spacers Installation | AutoCity Imports Blog […]
[…] on my car this past weekend. Check out the blog post we made with install pictures below! Ichiba V2 Spacers Installation Alex Skatkov To view links or images in signatures your post count must be 10 or greater. […]